A brand-new VPS, by default, is a blank slate. While powerful, it’s also a potential target for the countless automated bots constantly scanning the internet for unprotected servers. Your first hour with a new VPS is the most critical time to establish a strong security foundation.
This is not a task for security experts only. This is VPS security 101.
This guide is designed for anyone who has just purchased their first VPS. We will walk you through the five most important, non-negotiable security steps to “harden” your server. Whether you’ve just launched a new vps laos to serve the Mekong region or are preparing an instance in another market, these foundational steps are universal. By following this checklist, you’ll transform your new server from a default installation into a secure fortress, ready for you to build upon with confidence.

1. Prerequisites: What You Need to Start
Before we begin, make sure you have the following:
Your VinaHost VPS Details: After purchasing, you received an email with your server’s IP address, the default username (root), and a temporary password.
An SSH Client: This program allows you to securely connect to and command your server.
Windows: Use a free tool like PuTTY or the built-in SSH functionality in Windows Terminal or PowerShell.
macOS / Linux: You can use the Terminal application that comes pre-installed.
Let’s begin. The clock is ticking!
Step 1: Change the Default Root Password
The Problem: The initial password provided by your hosting company is temporary. It was automatically generated and has been transmitted via email. Think of it as the “master key” the landlord gives you. The very first thing you do in a new house is change the locks.

The Solution: Immediately change the password for the root user to something unique, complex, and known only to you. The root user is the super-administrator of your server, with the power to do absolutely anything. Its password is your first and most important line of defense.
Connect to your server via SSH. Open your terminal or PuTTY and use the following command, replacing the placeholder with your server’s actual IP address:
Bash
ssh root@your_server_ipYou will be prompted for the password. Copy and paste the temporary password from your welcome email.
Once logged in, change the password. Type the following command and press Enter:
Bash
passwdThe system will prompt you to enter your new password twice. Note that you won’t see any characters as you type—this is a standard security feature.
Choose a strong password (a mix of uppercase, lowercase, numbers, and symbols).
We highly recommend using a password manager like Bitwarden or 1Password to generate and store this complex password securely.
You’ve just changed the master key. Great start!
Step 2: Create a New User with Sudo Privileges
The Problem: Operating your server daily as the root user is like walking around with a live grenade. A single typo or a mistaken command executed as root can accidentally delete critical files and destroy your entire system. Furthermore, the username root is the single most common target for automated brute-force attacks.

The Solution: We will create a new, personal user account for our day-to-day tasks. We will then give this user “sudo” (superuser do) privileges, which allows them to run administrative commands when needed by prefixing the command with sudo. This adds a crucial layer of safety—you have to consciously elevate your privileges to perform sensitive actions.
Create the new user. While still logged in as root, run this command. Replace john with your desired username.
Bash
adduser johnThe system will ask you to set a new password for this user and then for some optional contact information (you can leave these blank by pressing Enter).
Grant administrative (sudo) privileges. We need to add our new user to the sudo group. This is what gives them the power to run commands as root.
Bash
usermod -aG sudo john(Remember to replace john with the username you created.)
Test it (optional but recommended). Switch to your new user account:
Bash
su - johnYour command prompt should now show john@your-vps-hostname. Now, try to run a privileged command, like viewing a restricted directory: sudo ls -la /root. You will be prompted for your user’s password (the one you just set for john), not the root password. If it works, you’ve successfully set up your new user!
Step 3: Disable Root Login via SSH
The Problem: Even with a strong password, the root user is still a target. Automated bots will hammer your server 24/7, trying to guess the root password. By disabling the ability to log in as root directly over the network, you effectively remove the target from the shooting range.

The Solution: We will configure the SSH service to only allow your new sudo user to log in. This forces everyone (including you) to log in with a non-privileged account first, which is a massive security enhancement.
⚠️ CRITICAL WARNING: Before you complete this step, you MUST verify that you can log in with your new sudo user from a new, separate terminal window. If you make a mistake and disable root login before confirming your new user works, you could lock yourself out of your server permanently!
Open a second terminal window and successfully log in with your new user: ssh john@your_server_ip. Once you are in, you can safely proceed in your original root terminal.
Edit the SSH configuration file. Use the nano text editor to open the file:
Bash
nano /etc/ssh/sshd_configFind and modify the PermitRootLogin line. Use the arrow keys to scroll down and find the line that says PermitRootLogin. It might be commented out with a # and look like #PermitRootLogin prohibit-password or it might say PermitRootLogin yes.
Change this line to be exactly:
Code
PermitRootLogin noMake sure to remove the # at the beginning if there is one.
Save and exit the file. Press Ctrl+X, then Y to confirm, and Enter to save.
Restart the SSH service to apply the changes.
Bash
systemctl restart ssh
Now, any attempt to log in as root via SSH will be immediately rejected. You have successfully hardened your server’s primary entry point.
Step 4: Set Up a Basic Firewall with UFW
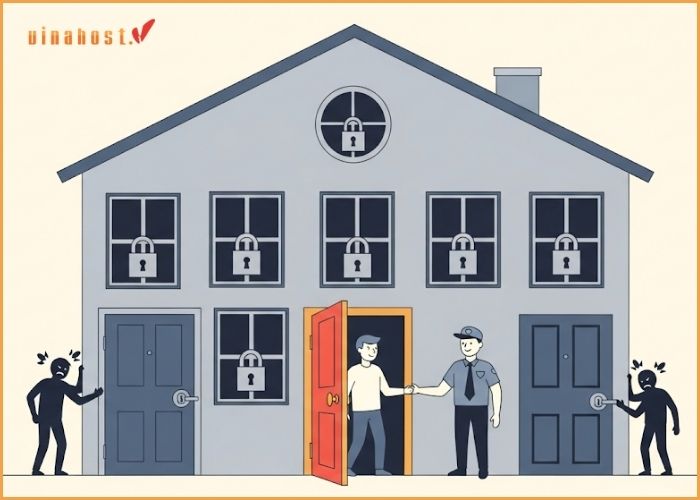
The Problem: By default, a server is like a house with every single door and window unlocked. Any service you install could potentially open a “port” (a digital doorway) that could be exploited. A firewall acts as a security guard, closing all doors by default and only opening the specific ones you explicitly allow.

The Solution: We will use UFW (Uncomplicated Firewall), the default and very user-friendly firewall tool for Ubuntu, to set up a basic but highly effective ruleset.
Allow essential connections. The first rule, and the most important, is to allow SSH connections. If you don’t do this before enabling the firewall, you will be locked out!
Bash
ufw allow OpenSSHAllow web traffic (optional but common). If you plan to host a website, you should also allow HTTP and HTTPS traffic now.
Bash
ufw allow 'WWW Full'Enable the firewall. Now that your essential rules are in place, you can turn the firewall on.
Bash
ufw enableThe system will warn you that this may disrupt existing SSH connections. Type y and press Enter.
Check the firewall status. You can see your active rules at any time with this command:
Bash
ufw statusYou should see that connections to OpenSSH and WWW Full are allowed from anywhere, and all other incoming connections are denied. Your server is now protected by a digital shield.
Step 5: Update Your System Software
The Problem: Software is never perfect. Developers are constantly finding and fixing security vulnerabilities in the operating system and its packages. An out-of-date server is a vulnerable server, full of known security holes that attackers can exploit.

The Solution: Your final essential step is to run a full system update. This downloads and applies all the latest security patches and bug fixes, ensuring your server’s software is as secure as possible from day one.
From your sudo user account, run the following commands. You will be prompted for your user’s password.
Bash
sudo apt update
sudo apt upgrade -y
What do these commands do?
sudo apt update doesn’t install anything. It simply downloads the latest list of available software packages from Ubuntu’s repositories.
sudo apt upgrade -y compares the list of what’s installed with the new list and installs the newer versions of everything on your system. The -y flag automatically answers “yes” to the confirmation prompts.
This process might take a few minutes, but when it’s done, your server is running the most recent and secure versions of its core software.
2. Conclusion: A Secure Foundation for Growth
In less than an hour, you have taken a default server and transformed it into a hardened, secure foundation. By completing these five steps, you have:
Secured the master account password.
Created a safer day-to-day user.
Eliminated the primary target for brute-force attacks.
Blocked all unwanted network connections.
Patched all known software vulnerabilities.
This secure foundation is not just a one-time task; it’s the repeatable blueprint for your project’s growth. As your business expands, you will apply this exact security checklist to every new server you deploy. When you need to provide low-latency performance for customers in Kuala Lumpur or Singapore, spinning up a vps malaysia and running these five steps becomes a simple, routine part of your expansion strategy.
But what happens when your application grows beyond the resources of even a powerful VPS? When you need maximum, uncontended power for a high-traffic e-commerce site or a mission-critical application, your next logical step is a dedicated server. This is where you get an entire physical machine to yourself, offering unparalleled performance and control.
The same strategic thinking applies. For ultimate performance in the Indochina region, a dedicated server laos provides the raw processing power and network capacity you need. Similarly, for major enterprise clients targeting the ASEAN hub, a dedicated server malaysia ensures your infrastructure can handle any demand without compromise. The fundamental security principles you’ve learned here are even more critical on these powerful machines.
Your server is now ready. Go ahead and build something amazing
Ready to start with a secure and powerful VPS?
 Tiếng Việt
 English
 简体中文
简体中文


