2. How to Rent a Cheap VPS at VinaHost
To purchase a cheap VPS, simply follow these 3 steps:
Step 1: Choose a suitable plan and click “Order”.
Step 2: Select your billing cycle and operating system, then click “Continue”.
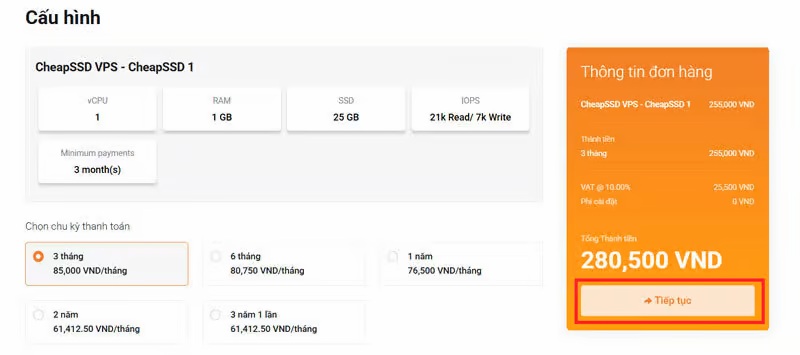
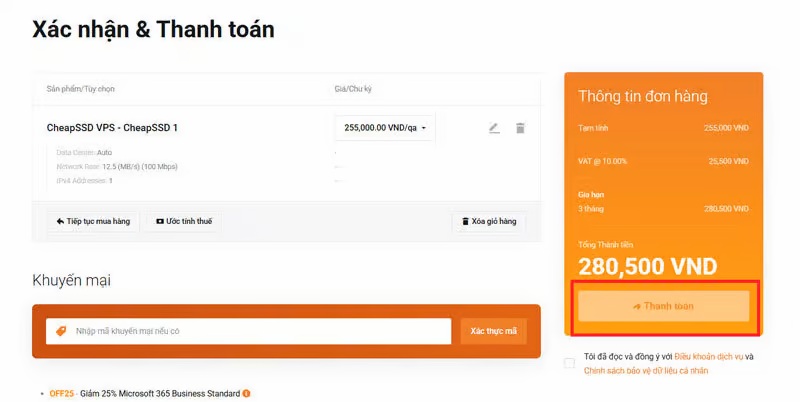
Step 3: Fill in your details and click Checkout.
3. How to Point a Domain to VinaHost VPS
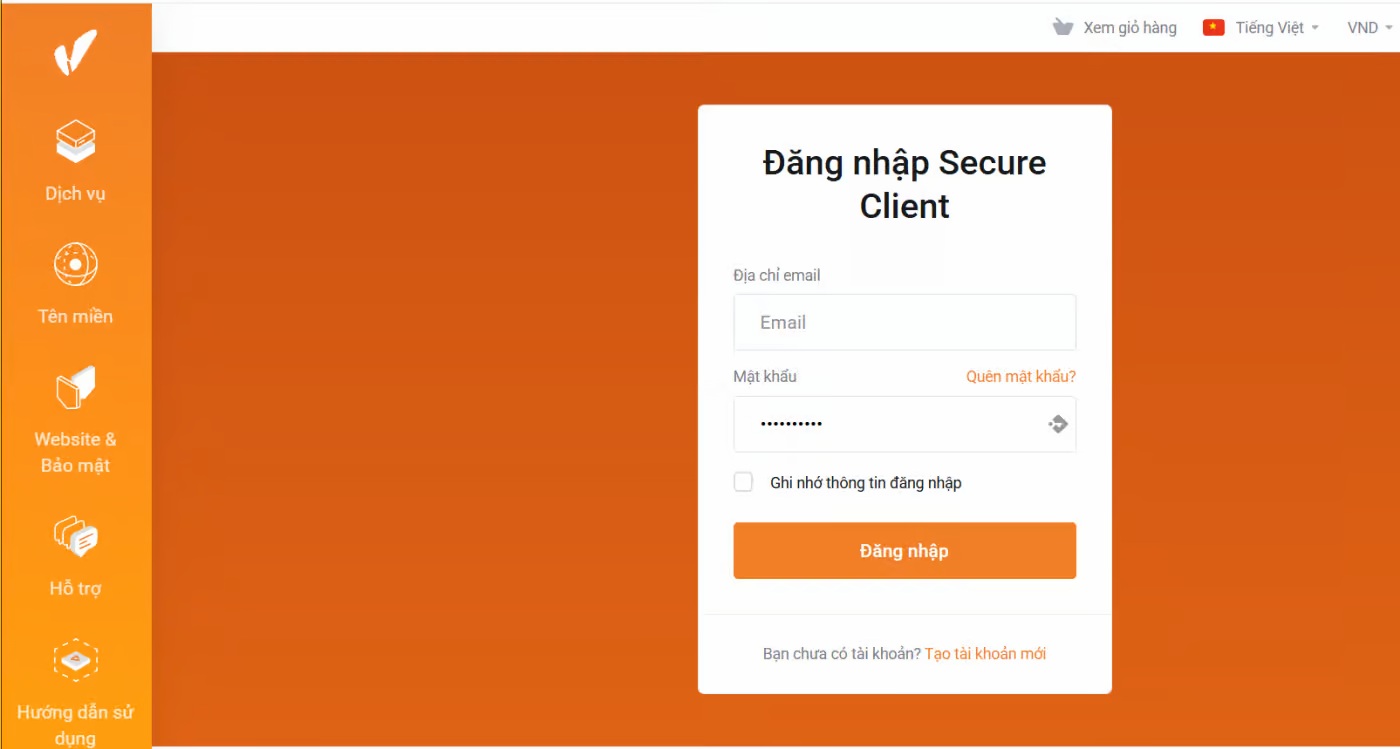
Step 1: Log in to your VinaHost client area
Open your browser and go to https://secure.vinahost.vn/ac/index.php?rp=/login.
Step 2: Go to the Control Panel
From the main interface, select “Control Panel” and click on the domain you want to configure.

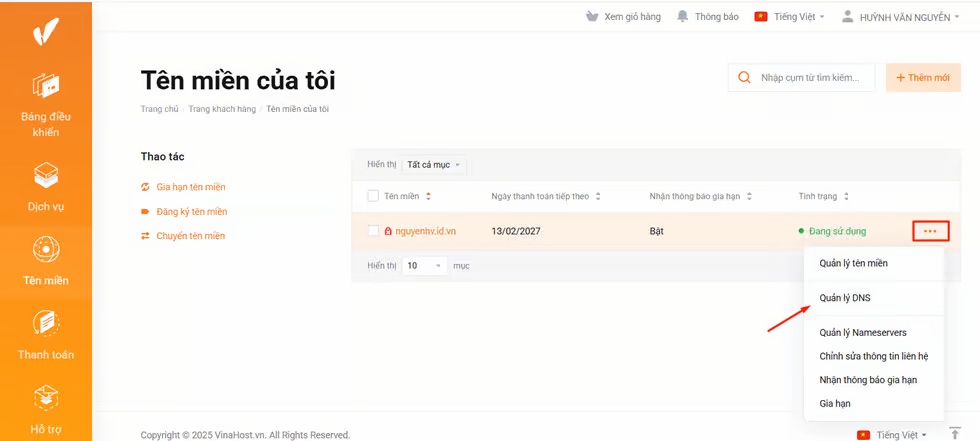
Step 3: Open DNS Management
Click the three-dot icon next to your domain, then select “DNS Management”.
Step 4: Add a new record
In the DNS window, click “Add record” to create a new record.

Step 5: Configure the record
When the “Add New Record” tab appears, fill in the details as follows:
Name: Enter the subdomain name. For example, if your main domain is
nguyenhv.id.vnand you want to createn8n.nguyenhv.id.vn, enter “n8n”. For the root domain, use@.Type: Choose the record type (A, CNAME, MX, TXT). Here, select A.
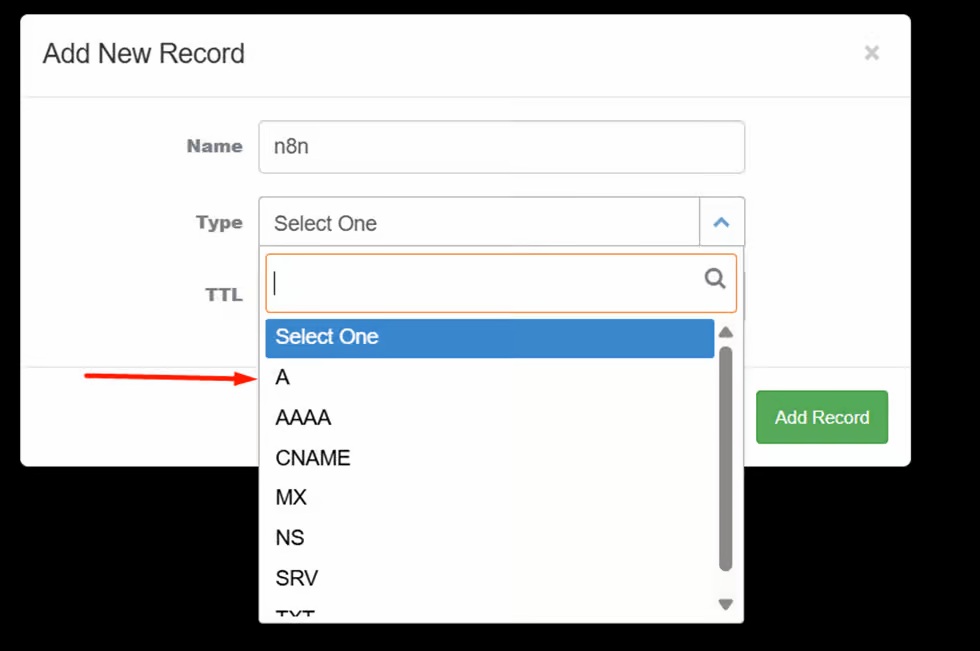
RDATA: Enter your VPS’s IPv4 address. When you register a VPS at VinaHost, this information is sent to your email. Copy that IP address into this field.

Click “Add record” to save.
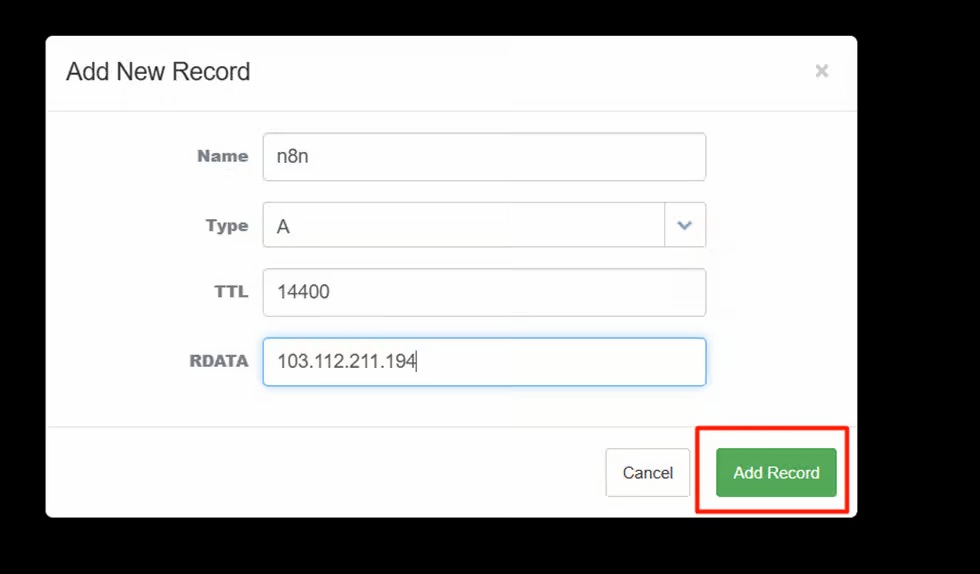
The screen will display as follows:

Step 6: Verify the result
Open Terminal (Windows: Windows + R → cmd; macOS: Command + Space → Terminal) and run:
ping your_domain
If it returns the correct IP, your record is active.
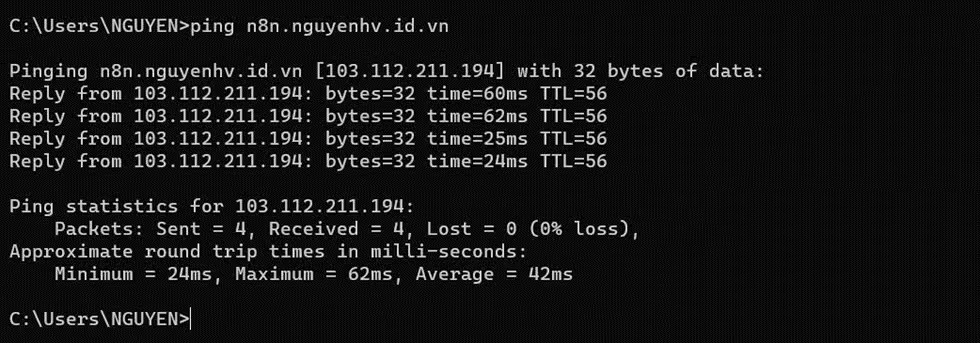
If not, it may take time for DNS to sync, or you may need to clear your DNS cache using:
ipconfig /flushdns
Then try pinging again.
4. How to Reinstall the Operating System on a VinaHost VPS
Note: Reinstalling the OS will erase all data on your VPS, including:
All files, websites, databases, emails, and backups
Previous configurations and installed software
Data cannot be recovered after reinstallation
VinaHost is not responsible for data loss if you fail to back up your data beforehand.
Step 1: Log in
Visit https://secure.vinahost.vn/ and log in to your client area.
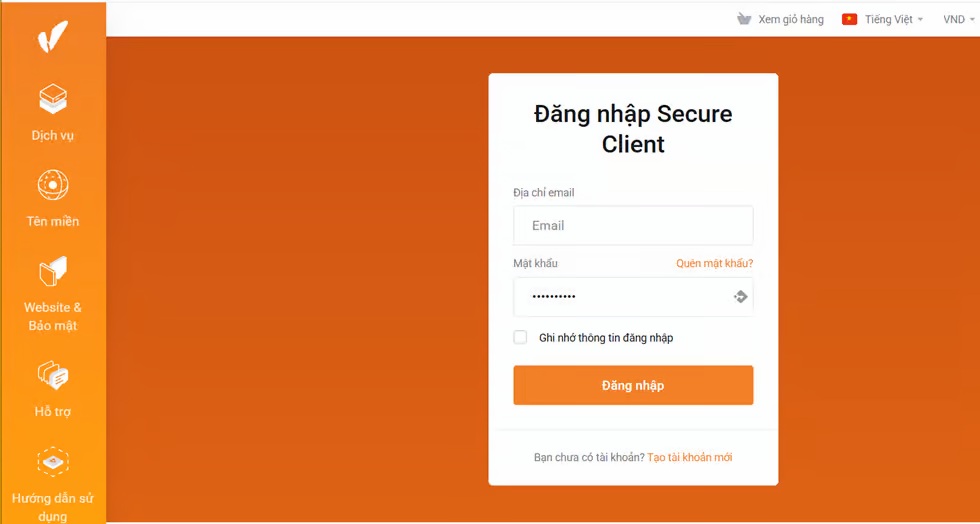
Step 2: Select your VPS service
Go to “Services” and click the VPS you want to reinstall.
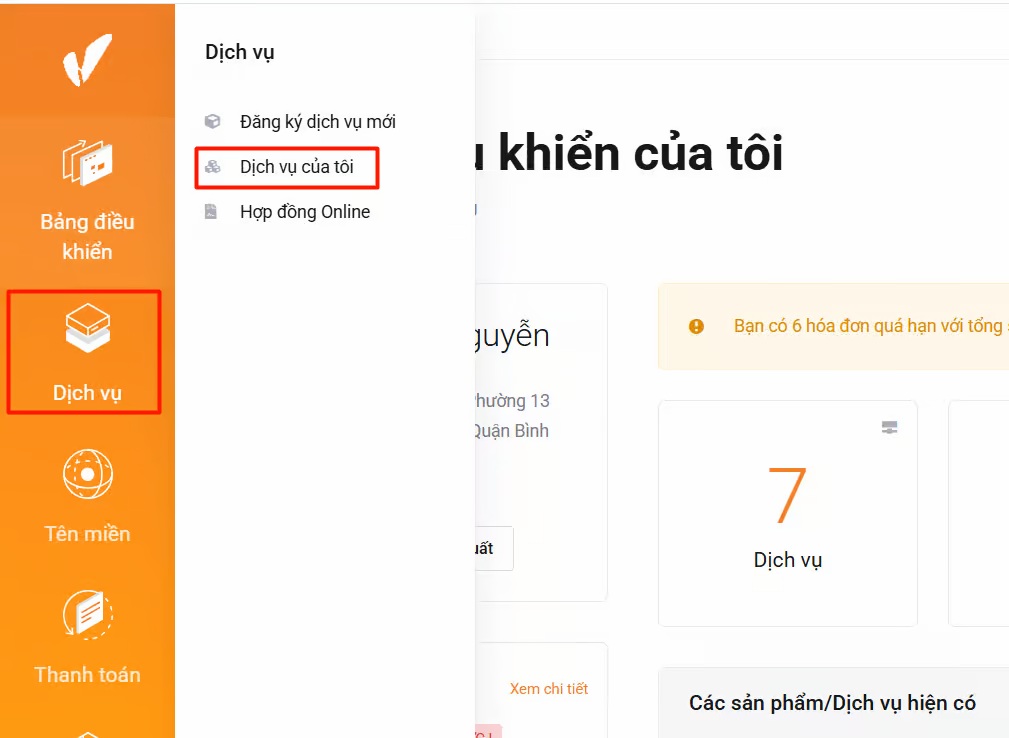
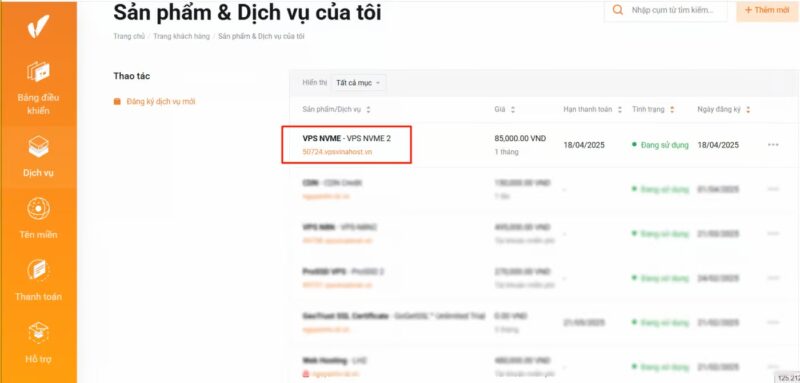
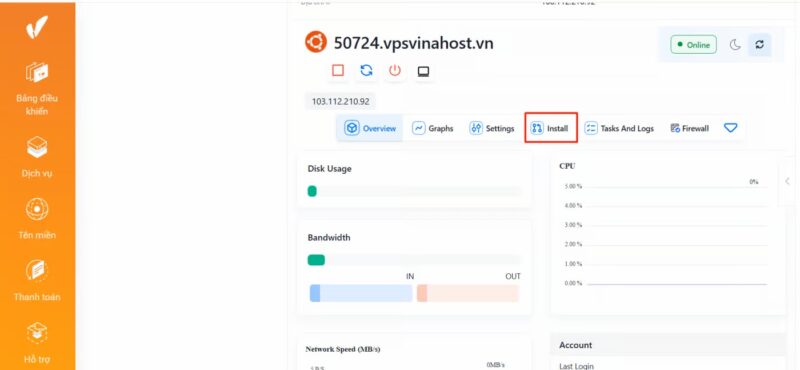
Step 3: Open OS installation
Scroll down and select “Install”.
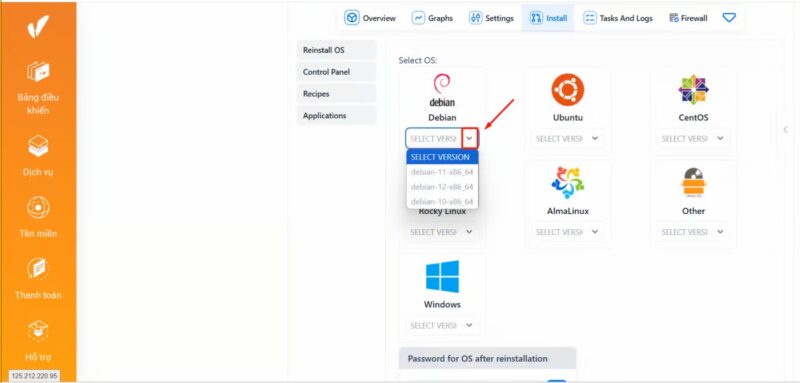
Step 4: Choose an OS version
Click the arrow icon to open the list of available operating systems, then select the one you want.
Step 5: Set a password
Enter a new password (use a strong one) and confirm it in the “Retype” field.
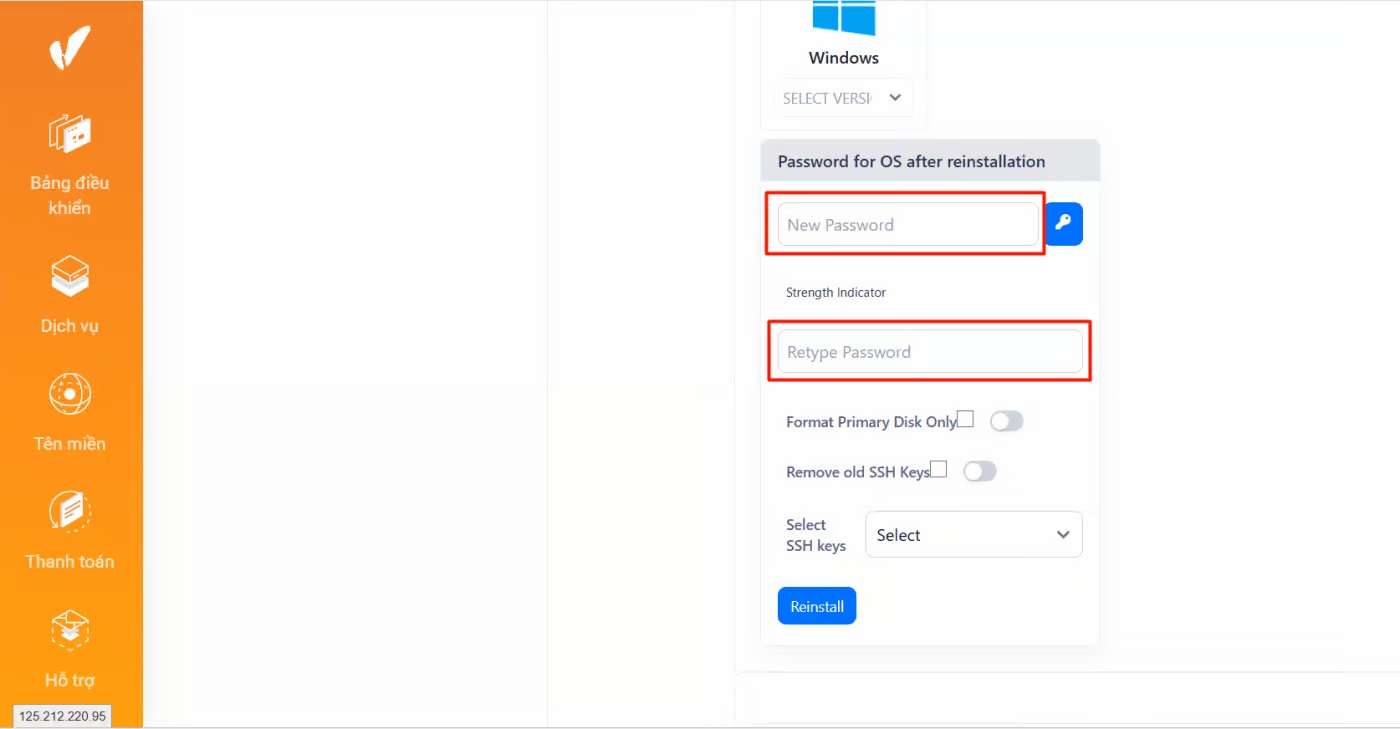
Or click the key icon to generate a random password automatically, then copy and save it.

Step 6: Start installation
Click “Reinstall”, then confirm by pressing “OK”.
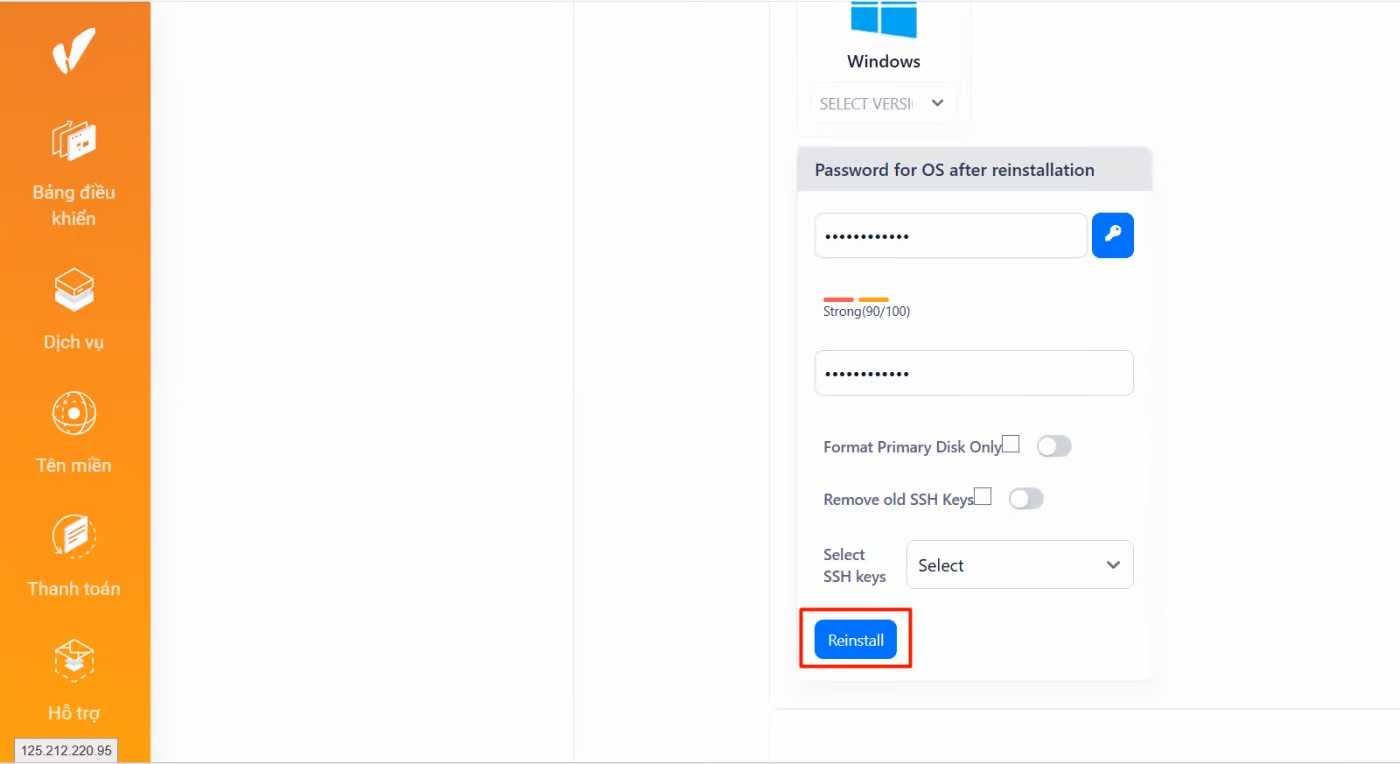
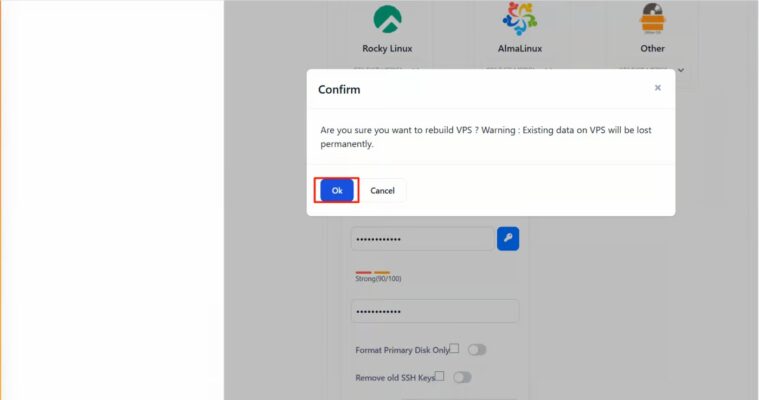
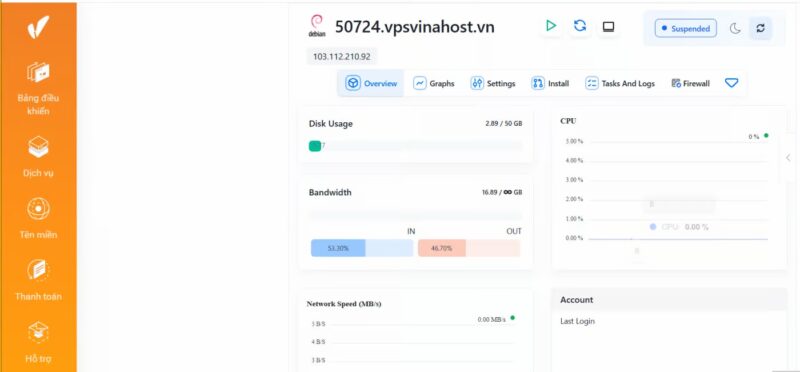
Reload the page after 3–5 minutes — your new OS will be installed and displayed in the interface.
With over 15 years of experience providing VPS services, VinaHost guarantees high-quality performance with servers hosted in Tier 3 standard data centers, delivering strong network speeds and 24/7 technical support.
Additionally, VinaHost offers free limited VPS management, as well as optional full server management services tailored to customer needs.


 Tiếng Việt
 English
 简体中文
简体中文


