 Tiếng Việt
 English
 简体中文
简体中文


Are you tired of being a digital tenant? Paying recurring subscription fees to big tech companies just to store your own photos, documents, and precious memories? Worried about who’s reading your data and what they’re doing with it? If you’ve ever wished for a digital home that you truly own, you’re in the right place.
This is your definitive 2025 guide to achieving digital sovereignty. We’re not just building a simple file server: we’re creating a secure and completely private replacement for services like Google Drive, Google Photos and iCloud. We’ll do it using powerful, free, open-source software and the most modern, secure deployment method available.
It’s time to take back control. Let’s build your forever cloud.
1. Planning Your Cloud: The Two Paths to Digital Owner ship
Before we lay the first digital brick, you need to decide where your cloud will live. This is the most important decision you’ll make, and it all comes down to your comfort level and goals.
Path 1: The Home Lab
This involves running your cloud on a computer physically located in your home. This could be a tiny, power-sipping Raspberry Pi, an old laptop given a heroic second act, or a dedicated home server.
Pros: You only have a one-time hardware cost, and you have ultimate physical control over your data. No one can touch it without being in the same room.
Cons: It relies entirely on your home internet’s speed and reliability. Power outages or internet downtime mean your cloud is offline. Making it securely accessible from outside your home requires more networking knowledge.

Path 2: The Cloud VPS
This involves renting a Virtual Private Server (VPS) – your own private, guaranteed slice of a powerful computer in a professional data center.
Pros: You get blazing-fast performance and rock-solid reliability (99.9% uptime). It’s straightforward to make your cloud public and secure. Plus, you don’t have to worry about hardware maintenance.
Cons: It comes with a recurring monthly fee, though this is often cheaper than a single Google Workspace or Apple One subscription.
For Peak Performance in Southeast Asia: If you, your family, or your team are located in Southeast Asia, latency matters. Placing your cloud closer to its users means faster file syncs, quicker photo uploads, and a snappier web interface. A high-speed VPS in Malaysia, a major regional connectivity hub, is an excellent choice for serving users across the ASEAN region.
For a Strategic Local Presence: For businesses or individuals focusing on emerging markets, establishing a local digital presence is key. Hosting your cloud on a reliable VPS in Laos ensures the lowest possible latency for users within the country and demonstrates a commitment to the local infrastructure.
Choosing a VPS isn’t just about CPU and RAM; it’s about strategically placing your digital home. The physical location of your server directly impacts performance and aligns with the very principle of digital sovereignty. Your data will be governed by the laws of the country where the server resides.
Our Recommendation: For the best combination of reliability, performance, and ease of secure setup, this guide will proceed using a Cloud VPS. The principles and commands, however, are nearly identical if you choose the Home Lab path.
2. The Blueprint: Your Cloud’s Core Components
Every great build needs a blueprint. Here’s the modern, secure software stack we’ll use to construct your cloud, explained in simple terms.
The Server OS: Ubuntu 22.04 Think of this as the foundation of your digital home. Ubuntu is rock-solid, incredibly popular, and has massive community support.
The Engine: Nextcloud This is the heart of your operation. It’s the leading open-source platform that provides the beautiful web interface, file syncing, and a massive app store to add new features. It’s the Swiss Army knife of private clouds.
The Method: Docker vs Docker Compose This is the magic. Instead of installing software directly onto the server, Docker runs each component in its own isolated, secure container. Think of it like a set of perfectly organized, pre-packaged LEGO blocks. This makes installation, updates, and management incredibly simple and reliable.
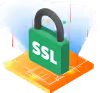
The Security Guard: A Reverse Proxy This is the non-negotiable front door security for your cloud. It acts as a digital bouncer, directing all traffic, fending off bad actors, and most importantly, providing free, automatic SSL/TLS encryption.

Part 1: The Step-by-Step Secure Installation
Ready to build? Let’s get to work. Follow these steps carefully, and you’ll have a secure cloud up and running in no time.
Step 1: Prepare Your Server and Domain Name
Get a VPS: Sign up with a reputable VPS provider. A basic plan with 2 CPU cores, 2GB of RAM, and 40GB of storage is a great starting point.
Buy a Domain Name: Purchase a domain name from a registrar like Namecheap or Porkbun. This will be your cloud’s permanent, personal address.
Point Your Domain: In your domain registrar’s DNS settings, create an ‘A’ record. Set the Host to @ and the Value to your server’s public IP address.
Step 2: Install Docker and Set Up the Firewall
Connect to your server via SSH. Now, let’s secure it and install our tools.
Install Docker: Run these commands to install Docker and Docker Compose.
sudo apt update
sudo apt install docker.io docker-compose -y
Set Up the Firewall (UFW): We’ll use Uncomplicated Firewall to lock down your server, allowing only the traffic we need. This is a critical first line of defense.
sudo ufw allow ssh
sudo ufw allow http
sudo ufw allow https
sudo ufw enable

Step 3: The docker-compose.yml for a Secure & Performant Cloud
This is our master plan. Create a new file named docker-compose.yml on your server and paste the following content into it. This blueprint is production-ready and includes key performance and security enhancements that many basic tutorials miss.
version: '3.8'

services:
  # The Reverse Proxy - Our Security Guard
  traefik:
    image: traefik:latest
    container_name: traefik
    command:
      - "--api.insecure=true"
      - "--providers.docker=true"
      - "--providers.docker.exposedbydefault=false"
      - "--entrypoints.web.address=:80"
      - "--entrypoints.websecure.address=:443"
      - "--certificatesresolvers.myresolver.acme.tlschallenge=true"
      - "--certificatesresolvers.myresolver.acme.email=your-email@example.com"
      - "--certificatesresolvers.myresolver.acme.storage=/letsencrypt/acme.json"
    ports:
      - "80:80"
      - "443:443"
      - "8080:8080" # For Traefik Dashboard
    volumes:
      - "./letsencrypt:/letsencrypt"
      - "/var/run/docker.sock:/var/run/docker.sock:ro"

  # The Database - Where Nextcloud's brain lives
  db:
    image: postgres:15
    container_name: nextcloud-db
    restart: always
    volumes:
      - db-data:/var/lib/postgresql/data
    environment:
      - POSTGRES_DB=nextcloud
      - POSTGRES_USER=nextcloud
      - POSTGRES_PASSWORD=YOUR_STRONG_DATABASE_PASSWORD # Change this!

  # The Performance Booster
  redis:
    image: redis:alpine
    container_name: nextcloud-redis
    restart: always

  # The Engine - Nextcloud Itself!
  nextcloud:
    image: nextcloud:latest
    container_name: nextcloud-app
    restart: always
    depends_on:
      - db
      - redis
    volumes:
      - nextcloud-data:/var/www/html
    environment:
      - POSTGRES_HOST=db
      - POSTGRES_DB=nextcloud
      - POSTGRES_USER=nextcloud
      - POSTGRES_PASSWORD=YOUR_STRONG_DATABASE_PASSWORD # Use the same one as above!
      - REDIS_HOST=redis
    labels:
      - "traefik.enable=true"
      - "traefik.http.routers.nextcloud.rule=Host(`cloud.your-domain.com`)" # Change this!
      - "traefik.http.routers.nextcloud.entrypoints=websecure"
      - "traefik.http.routers.nextcloud.tls.certresolver=myresolver"
      - "traefik.http.services.nextcloud.loadbalancer.server.port=80"

volumes:
  db-data:
  nextcloud-data:
  letsencrypt:
Before you save:
Replace your-email@example.com with your real email address.
Change YOUR_STRONG_DATABASE_PASSWORD to a unique, strong password.
Change cloud.your-domain.com to the actual domain you want to use.
Step 4: Launching and Securing Your Cloud with HTTPS
With our blueprint in place, the launch is a single command:
Docker will now pull all the necessary images and start your services. The real magic is that Traefik will automatically detect Nextcloud, talk to Let’s Encrypt to get a free SSL certificate, and enforce secure HTTPS on all connections. No manual SSL configuration required!

Part 2: Essential Post-Installation Hardening
Your cloud is running, but our work isn’t done. A secure cloud goes beyond the initial setup. This is what separates a hobby project from a fortress for your data.
First Login and Initial Nextcloud Setup
Navigate to your domain. You will be greeted by the Nextcloud setup screen.
Create your admin username and password.
Click through the initial setup screens.
Mandatory Security Configurations
Inside your Nextcloud dashboard, go to Settings -> Security.
Enforce Two-Factor Authentication (2FA): This is the single most important step to protect your accounts. In the admin settings, find the “Enforce two-factor authentication” option. Enable it and have every user set it up with an app like Google Authenticator or Authy.
Install and Configure the Brute-Force Protection App: Go to Apps and install the “Brute-force protection” app. It’s usually installed by default and works out of the box to block IP addresses that repeatedly fail to log in.
Run the Security Scan: In the Overview section of your admin settings, Nextcloud provides a security scan. It will give you a list of recommendations to further harden your server.

Part 3: Using Your New Private Cloud
Syncing Your Files with Desktop and Mobile Clients
The real power of Nextcloud is its seamless syncing. Download the official clients for all your devices from the Nextcloud website.
When you set them up, simply enter your secure domain address, your username, and your password. Your files will now be synced and accessible everywhere.

Expanding Your Cloud’s Power: Recommended Apps
The default file syncing is just the beginning. Head to the “Apps” section in Nextcloud to install these game-changers:
Nextcloud Office: Edit documents, spreadsheets, and presentations right in your browser, with real-time collaboration. It’s your private Google Docs.
Memories: A stunning, private, and AI-powered alternative to Google Photos. It automatically organizes and tags your pictures.
Nextcloud Calendar/Contacts: Sync your calendars and contacts across all devices to complete the de-Googling process.
You Are Now Digitally Sovereign
Take a moment to appreciate what you’ve just accomplished. You didn’t just install some software; you built a private, secure, and powerful digital home. You now have complete control and ownership of your most important data, free from third-party surveillance and endless subscription fees.
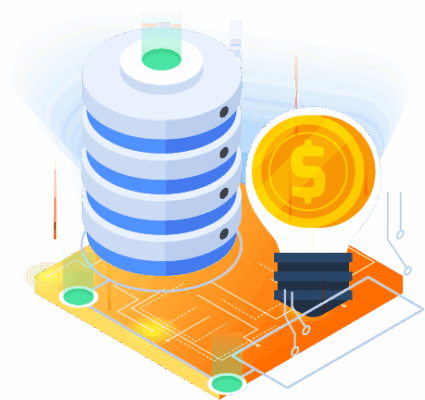
This Nextcloud instance on a VPS is a fortress for your personal data. But what happens when your small business grows, you need to serve a large community, or your data storage needs scale into terabytes? When guaranteed resources, maximum I/O performance for large video files, and uncompromised power are non-negotiable, it’s time to consider a dedicated server.
A dedicated server is the ultimate expression of digital ownership—an entire physical machine devoted solely to your cloud.
For businesses requiring a robust, single-tenant environment to manage sensitive corporate data in Malaysia, a dedicated server in Malaysia provides the ultimate foundation for performance and security.
Similarly, for organizations building critical infrastructure or data-intensive applications for the Laotian market, a dedicated server in Laos ensures you have the raw power and exclusive resources to operate without compromise.
Welcome to the world of digital sovereignty. Your data is finally, truly, yours.

Hello, I am Le Van, I believe that a successful website is the perfect combination of smart SEO strategy and a solid hosting infrastructure. Through the articles on the blog, I hope to share practical knowledge, detailed and easy-to-apply instructions, helping you not only improve your ranking on Google but also enhance the user experience effectively.


